DivideWorks
  • HOME
  • PROJECTS
  • CONTACT

GEAR 360

7/29/2016

0 Comments

 
Picture
#insidersgear360

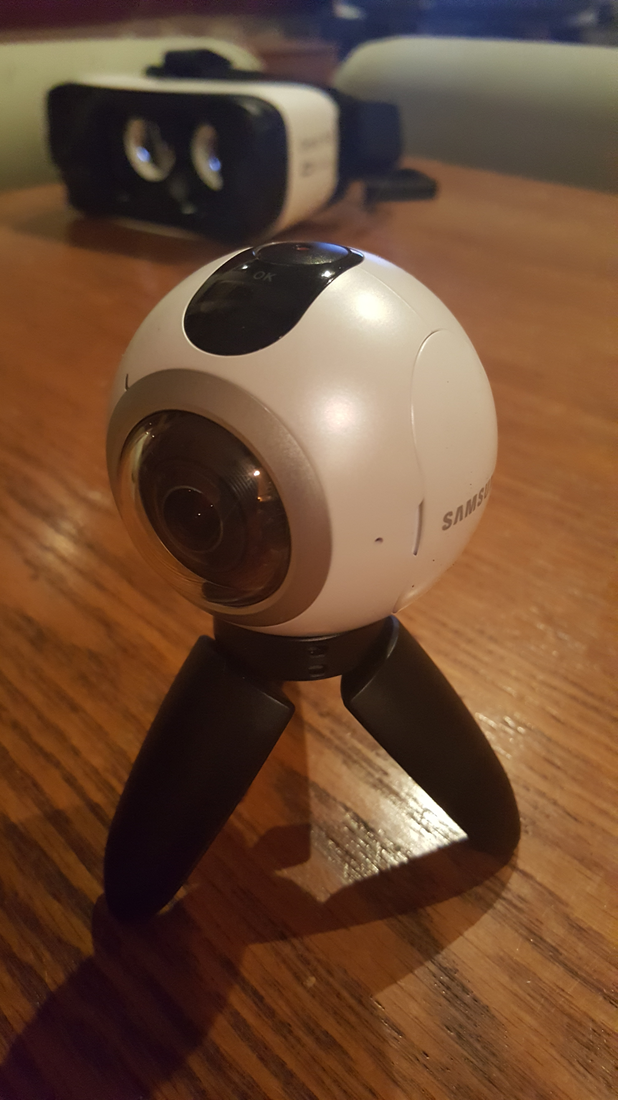
​Making your own VR content is easy with the Samsung Gear 360 camera. With the option to record both still photos and video in both 180 degrees and 360 degrees. setting up the Gear 360 couldn't have been easier. I simply inserted the battery and SD card then plugged in the charger until the charging indicator LED turned green and I was ready to begin. For step by step instructions Check out this awesome Instructable.


http://www.instructables.com/id/Gear360-VR-Home-Video
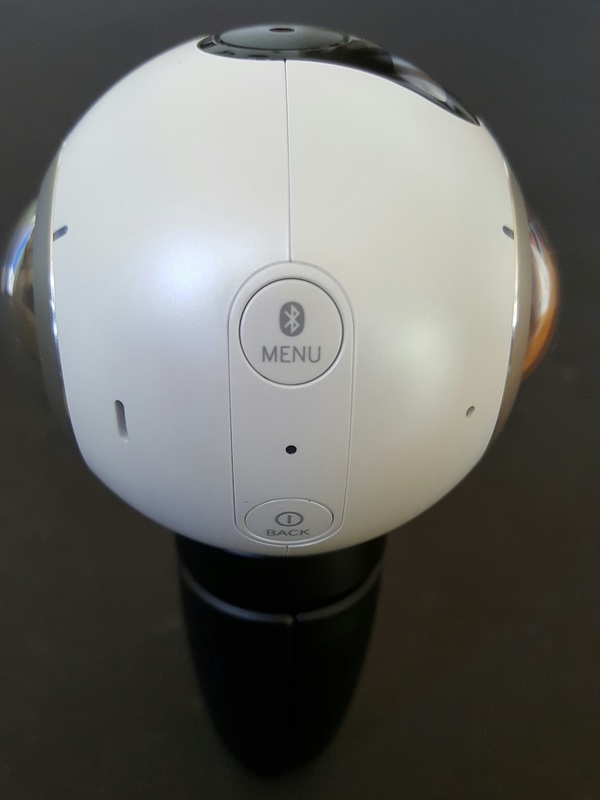
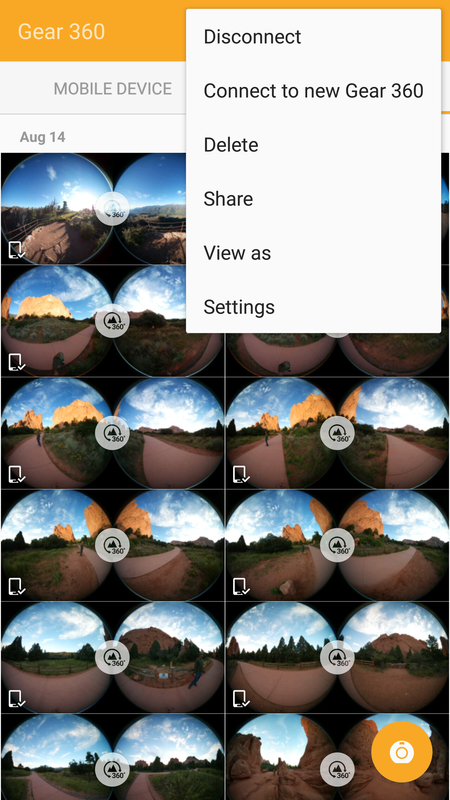
The controls on the camera provide a simple stand alone interface with the Gear 360, which allows you to switch between photos and video and dual lense or single lense. You can also adjust the timer function, so you can press the shutter button and then get yourself into the shot.
Picture
While the integral controls are convenient and simple to use for basic functions, they do not offer access to all of the camera's features. To get the most out of the Gear360 you should download the Samsung Gear360 app. The app provides an easy to use interface with the camera and gives you a real time image preview on your phone.
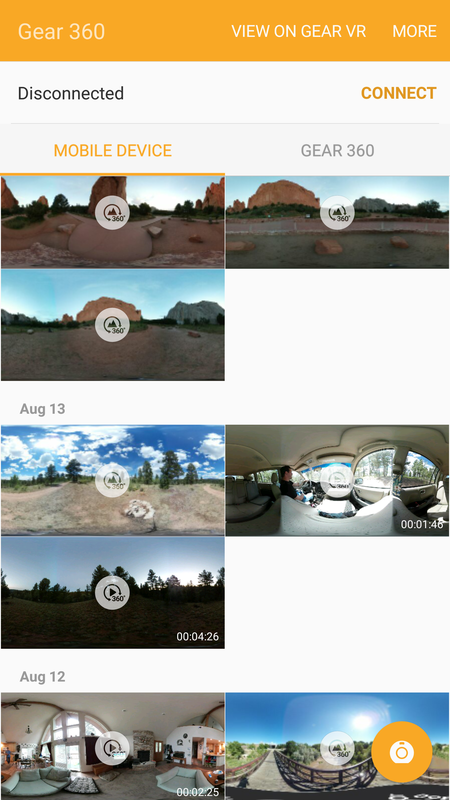
one of the few features not available in the app is stitching the highest quality 4k 360 videos. This may actually be a short coming off my phone and not the app. I have a Note 5, but I have heard it can be done on the S7. Since I don't have plans to upgrade to the S7 anytime soon, I will be using Action Director on my Windows PC to render 4K video. Action Director also let's you do some editing to your videos like adding titles, slow or fast motion effects and transitioning multiple videos together.
Picture
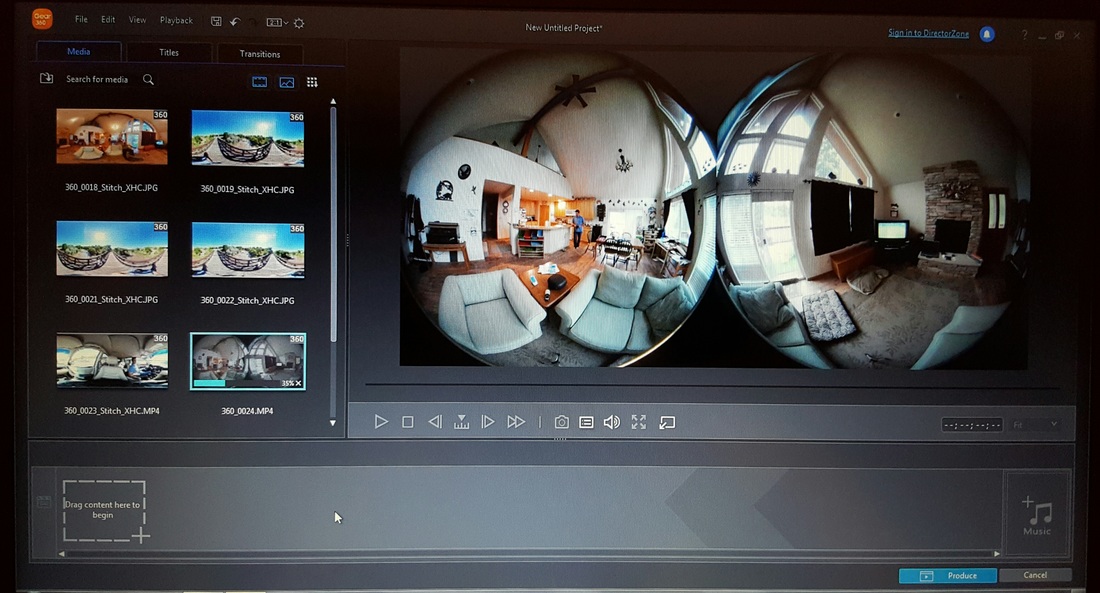
The image below is a still frame from a 360 degree video taken on the highest resolution. I was standing about 15 feet away from the camera. The image on the right was rendered using the Gear360 app, while the image on the right is from video rendered using the Action Director software on my laptop. Keep in mind, the screenshots are both taken by pausing the video and zooming in. You can see the Action Director image quality is sharper.
Picture
0 Comments

Hack Your GEAR VR

3/24/2016

7 Comments


UPDATE

The addition of the Gear VR Controller is a big improvement but for driving games I wanted a steering wheel controller. When my search for one came up empty, I made my own. You can see that build and get the files to build your own at
http://www.instructables.com/id/Steering-Wheel-for-GearVR-Controller
Picture
Picture

CARDBOARD FOR GEAR

Want to use your favorite cardboard apps on your Gear or use your Gear to remote into your desktop computer. You can install apps that aren't available on the Oculus store. You can even play games that are exclusive to the Oculus Rift and integrate hand tracking for a truly immersive experience. I'll try and cover some of the simple hacks for the Gear VR headset that will let you open new experiences in virtual reality.
Picture
Where to start? If you're going to use your Gear for Cardboard apps, you'll want to configure your apps for the Gear headset. The QR code above will set up your Cardboard apps to match the lenses used on the Gear. Now let's use Package Disabler Pro to allow the use of Cardboard apps on the Gear VR headset.
Package Disabler Pro

The app is easy to use. Simply scroll down to find the Oculus Gear VR Service and check the box. That's it. You're ready to go. Now you can start up your favorite Cardboard app and then put your phone into the Gear. The Oculus service is disabled, so Oculus Home won't launch. The best part is the touch pad still works, so no need for a magnet switch. When you're ready to go back to using Gear VR apps you simply uncheck the box next to the Oculus Gear VR Service and everything is back to normal. A recent update has added a 2X1 widget, so you can toggle the Oculus Service on & off with one touch.
Picture
A few Cardboard apps that are worth the trouble include:
​Cardboard
Fulldive
Swivel Gun.VR.Logride
Invasion VR
Tilt Brush Gallery
VR Remote Desktop (requires PC companion program)​
TrinusVR (requires PC companion program)
VR AR ​Cmoar TV (requires QR code image)
​WizardAcademy(requires QR code image for hand tracking)
​
With Trinus VR you can run games like Minecraft on your PC and play them through your VR headset.
With VR Remote Desktop you can view and control your PC desktop through a VR interface.

​UPDATE I recently bought a MJX400 drone which includes a wifi camera for FPV flying. The MJX FPV app is available for Android, so I can use the Package Disabler Pro app to let me Fly my drone with a FPV, using my Gear VR. see more on my other post.
www.divideworks.com/projects/fly-your-drone-with-gear-vr-fpv​

SIDELOAD VR

Next, let's cover how to side load apps to work with the Gear headset. Sideloading is installing an app that is designed to work with the Oculus Gear VR Service, but is not available on the Oculus store. Once you have an app side loaded you can run it without disabling the Oculus service. Instead you can open the app on your phone before inserting it into the Gear headset. The app will prompt you to place your phone into the Gear to start the app.

​First, you will need to install SideloadVR it is also helpful to install SideloadVR DeviceID.
Using SideloadVR DeviceID copy your phones device ID. Now start SideloadVR and you will be prompted to enter your device ID, just paste it in and let the app do its thing.
Below is a screen shot showing some of the apps I have sideloaded.
Picture

OCULUS

Okay. Now let's see if we can use our GearVR headset to run programs designed exclusively for the Oculus Rift. Games made for the Oculus Rift run on a PC, but they require a Rift headset to be plugged in to the PC in order to run.
With Rift Cat installed on your PC it will emulate a Rift headset and stream the game to your Gear. You can learn more at www.riftcat.com You will also need to install the RiftCat app from the Google Play Store.
UPDATE RiftCat is now available on Sideload VR.

HAND TRACKING

The image below is used by apps like Wizard Academy VR and Germ Buster as a handheld hand tracking device. This option does not offer any finger positioning, but is a very simple method for incorporating your hands into virtual reality.
Picture
UPDATE I found a new app that uses a custom QR for handtrackin called Stalk VR Survival  
​
play.google.com/store/apps/details?id=com.DigiRep.ZombiesOfTheCorn
Their QR code can be downloaded here.
​http://www.digirepgames.com/tracker-howto.html
In this app you are stationary while zombies attack from all directions. You can spin around and use the QR code gun to aim in the game. Here is a video to show how well this works.
Picture
The video below covers how to disable the Oculus service and then shows side by side video to illustrate the hand tracking feature.
The Leap Motion Controller is a great way to add hand tracking to your PC and with apps like TrinusVR or Rift Cat it is possible to use the Leap Motion Controller to add hand tracking into virtual reality. Leap Motion currently has a private alpha SDK for Android developers, which looks promising. Check out www.leapmotion.com and go to the VR page. There you will find programs built with VR in mind. You will need to find a way to mount the Leap Motion Controller to the front of your GearVR headset. The Leap Motion Controller is available with a 2' 6' and now a 15' cable so you can plug it into your PC and still enjoy the virtual Environment. UPDATE Leap Motion has published their own tutorial on how to combine Android VR with Leap Motion, using RiftCat on your PC.
​​http://blog.leapmotion.com/vr-prototyping-less-100-leap-motion-vridge/
Picture
The consumer version of the Gear does not support data through the usb port, but I've read that the 2nd innovators edition does. I haven't verified this because I dont have a Samsung Note 4. If it is true I may need to get ambitious and find a way to get USB OTG on my Note 5 headset. This would open the possibily of plugging sensors like the Leap Motion Controller directly to the headset or plugging in external storage, which would be useful on the Note 5 since Samsung decided to deny us a micro SD slot.

I plan to incorporate my Gear VR headset into a FPV internet controlled robot. Stay tuned and I'll share my efforts.
7 Comments

Gear VR

2/14/2016

0 Comments

 
I have been tinkering with virtual reality, since the launch of the Google Cardboard.  Through various trials I have learned about 3D photography and Videos, 360 degree panoramic photography.  I've learned new terms such as, (AR) augmented reality, photo-spheres, equi-rectangular projection,  (IPA) Interpupillary adjustment, (NUI) natural user interfaces, haptic feedback, and teledildonics .  It seems VR is just beginning to put all of these technologies together to offer the consumer compelling VR experiences.  Having tested the VR waters with the Google Cardboard and Durovis (open) Dive headsets I knew I wanted to upgrade to a higher end VR experience. The Oculus Rift DK2 is the Cadillac of virtual reality, but it is out of my budget and I don't like the idea of being tethered to a PC. Being a Samsung phone user, the Gear VR headset was an affordable alternative for me.  You can check the Gear VR headset out HERE.
Picture
Picture
I've been using my new Gear VR for about a month now and Ill start by saying it is leaps and bounds ahead of the DIY headsets Ive used before.  The experience is fully immersive and the headset is comfortable to wear for extended periods of time.  The built in control pad makes navigating through the Oculus home and many games and apps easy.  This is a big step up from the magnet ring on the cardboard, but you will still want to get a compatible game controller.  The focus adjustments works well and helps make the headset easy to setup for different users. The consumer headset is well designed, having benefited from the trial of the innovator edition, but the biggest improvement over the Cardboard or Dive has got to be the content. Unlike the VR apps you'll find on Google Play, which are more demos than consumer ready products, the Oculus store has only high quality finished products. 
The Oculus store is broke up into categories such as,  Must haves, New & Noteworthy, Games, Apps, Videos, Experiences and Concepts.  Some of my favorites include:
Some of the essential apps include:
Some of the more involved games will require a game controller, in order to play.  On my Dive headset I used a USB OTG adapter and an old PS3 controller.  The Gear VR consumer edition comes with a pass through USB port for charging, but is not USB OTG compatible.  I'm not ready to root my new Note 5, so I decided to buy a blue tooth game controller.  After a little research I found the official Samsung controller was no longer available and its replacement the Steel Series Stratus cost more than I was willing to pay, so I decided on the MOGA Power Pro.  This controller fits nicely in the Samsung Gear VR case and is fully compatible in MODE B.
Picture
Picture
While the built in track pad, back button and volume controls are a convenient way to interface with VR apps they do take away from the immersion into VR.  The best experience will only come from (NUI) Natural User Interfaces such as, the built in head tracking and eventual addition of hand tracking.  The Oculus Rift with its benefit of PC processing power already has an option for hand tracking using the LEAP Motion controller. See more on LEAP HERE.  The Samsung GearVR headset however, does not have a means to connect to the LEAP controller and even if it did its likely the Android device would not be able to keep up with both the VR app and the LEAP hand tracking data without overheating.  It appears as though Samsung is working on a solution for us.  The Samsung Rink looks very promising and has me waiting in anticipation.  See more on the Rink HERE.
The GearVR headset is a bargain at a price point under $100 (assuming you already have a compatible phone).  The VR experience is far better than the cardboard and Dive headsets I've used before.  However I do have some constructive criticism.  
I've been baffled by the lack of 3D stereoscopic photo support in any of the photo viewing apps available for the GearVR.  You can view 360 degree 3D photos and 360 degree 3D videos, but not a simple side by side 3D image.  I hope they add support for this to the VR Gallery app soon. 
There is a complete lack of (AR) augmented reality apps, in the market.  These would be apps that use the phone's camera to blend real world with virtual world.  CMOAR is a developer who have made some cool demos for the Google Cardboard.
In the Oculus menu, I would like to see an option to view the camera as a picture in picture overlayed on whatever app you happen to be using.
The Samsung internet app is a solid browser, but does not yet support VR content on the internet.  I've found that you can go full screen on 360 degree videos being streamed from youtube, but other VR content sites are not supported.  It would also be nice if you could resize open tabs and relocate them at will.
With all the VR content being added to youtube, it would be nice to have an optimized youtube player app.  Similar apps exist for the Google play market, but cannot be used on the GearVR without disabling the GearVR service on your phone, before inserting it into the headset.
I get why Oculus would want to keep the impressive content, on the Oculus store proprietary to Oculus or Gear users, but I dont understand the logic in limiting 3rd party apps from being used on the GearVR.  The youtube player is one app that comes to mind as missing from the Oculus store, another would be a VNC client app, which again is available for cardboard, but cannot be used on my GearVR headset.  I guess I wont throw my cardboard away just yet.  These limitation deliberately made to the GearVR headset can, as always be circumvented with a little effort, so what the point, unless the point is to aggravate the consumer.
The addition of hand tracking is a must.  A clever developer Realiteer Corp.  came up with a method for hand tracking that works, on the Google Cardboard, using nothing more than the phone's camera, a piece of cardboard and a QR code you print out at home.
The addition of a pass through micro USB port on the consumer version made it possible to charge your device while in use in the GearVR headset, but adding USB OTG compatibility to that port would open up possibilities for external storage and sensors.
For robotics purposes, an app that would send out the head tracking data over wifi or serial bluetooth would be useful.  I imagine using the VR internet browser to view an image from an IP webcam that pans and tilts, to the motion of your head.
Compatibility with more phones would seem like an obvious path to becoming the mainstream VR headset; however, I am a fan of Samsung's phones so this doesn't bother me.

In the month I've been using the GearVR headset, I've seen a steady stream of new apps on the Oculus store.  Apps like MilkVR are also adding new video content on an almost daily basis.  I cant wait to see where VR technology will take us tomorrow.
Picture
0 Comments

4 SIDED PYRAMID HOLOGRAPHIC DISPLAYS

11/26/2015

0 Comments

 
This is an easy way to create a display that will amaze.  Your 3D models and even home videos will appear to float in the center of the pyramid.  In the video above I used an old computer monitor and a Raspberry PI B+, but this effect can be achieved using a smart phone or tablet.  To make this effect work you will need to make a pyramid of clear plastic.  Thickness of the plastic is not important.  I've made these using thin sheeting from toy packaging, from CD cases and acrylic sheets.  The one in the video above was laser cut on an Epilog 3000 out of 1/16" Acrylic from Lowe's.  The pattern below was drawn to scale, on a 18" x 12" sheet, in Inkscape.  Inkscape is a free, open source vector graphics program.  Inkscape save files as .svg files, but the pattern below was exported as a .pdf and is formatted, to print to an Epilog laser cutter.  I used clear scotch tape, to tape the four side together, flat on a table.  Then, I used the tape as a hinge to form the sides and tape the fourth and final corner.  To keep it stable I used epoxy to glue the outside corners.
The image that is seen in the pyramid is the reflection of the image displayed on the screen.  If your model or image has a distinct left and right side or text, then you will need to display the mirror image of your object.  Depending on whether you are mounting your screen up or down will determine whether you need to display your model right side up or upside down. To do this, I had to figure out some new tools in SKetchup.  The easiest method, for creating the mirror image, I found was to select the object and right click.  You can then choose "Flip Along" and choose an axis.
The screenshots above go through the process, in sketchup, of changes the background to black, adjusting the view to eliminate the axis lines, changing the views and saving scenes and finally exporting an animation. I have skipped the basic steps of starting Sketchup, creating the block and coloring the blocks sides.  There are tons of great tutorials to get you started in Sketchup.  Blender is another good 3D modeling software that could provide similar functions.  Below is the exported animation from Sketchup.
Picture
Now that you have an animation of your 3D model you just need to multiply the video, rotating each copy 90 degrees.  I used Adobe Premier Pro for the PPM Logo video because I have access to Premier Pro at the Makerspace and I wanted to be able to save the video, for use on the RaspberryPi.  Holapex is a great app for Android that will automatically take your video and set it up for a 4 sided pyramid hologram display, using your phone or tablet as the display.
0 Comments

Tracked Vehicle Prototyping Platform

9/27/2015

 
Picture
A tracked vehicle makes a great platform for testing sensors, motor drivers, micro-controllers and softwware.  A small chasis, like the Tamiya chasis kit can provide a proving ground for your project before you go full scale.

The chasis kit is an easy way to get started, but  does have some draw backs.  The motor and gearbox you get with the kit has a solid axle, so there is no way to independently control the left and right tracks. To do this you willneed the dual gearbox.  The chasis is also narrow, leaving little room for electronics.  For these reasons I would recommend buying the tread kit and making your own chasis.

Picture
Picture
Above you can see one of the Tamiya dual gearbox assemblies.  This one has four possible gear ratios.  In the photo below, you can see I have used a simpler dual gearbox.  This one is slightly smaller, but still gives you two gear ratio options.  I designed a chasis that gave me a tread pattern, ground clearance and platform size advantage over the standard chasis kit.  I found 3mm bolts worked fine for the axles, allowing improved groung clearance over the standard through axles.
Picture
Picture
Picture
Once you have a rolling chasis with a drive train it's time to get creative and decide what components to load up your chasis with.  Ive used Arduino and RaspberryPi boards as my controller paired with motion sensors, ultra sonic distance sensors, light sensors etc.  Ive also had success controlling the device wirelessly using both bluetooth and wifi modules.
Picture
Once you've decided what components willbe on your vehicle, its time to select a power source.  wether you keepit simple with AA and 9 volt batteries or youtry to save some space and weight by using a rechargable lipo battery with a voltage regulator, you will need to pay attention to the different voltage and amperage limitations of each of your chosen components.  For example, your motors can likely handle 6 volts or more, but a raspi should only be supplied with 5 vdc.
Picture
Picture
<<Previous
Forward>>

    Author

    As a midnight maker I am inspired by the open source community to contribute and share some of the projects I have attempted.

    Categories

    All
    3D Printing
    Arduino
    Crafts
    Drones
    Electronics
    InMoov
    LED
    Natural User Interface
    POV
    VR

    Archives

    August 2017
    February 2017
    November 2016
    October 2016
    September 2016
    July 2016
    March 2016
    February 2016
    November 2015
    September 2015
    July 2015
    April 2015
    March 2015
    February 2015
    January 2015
    February 2014

"We cannot solve a problem by using the same kind of thinking we used when we created them."  [Albert Einstein]